Friday, September 14, 2012

Fork Cake Pops!

Last month I posted a how-to of my Oreo Cakeballs.


I told you how I wasn't the biggest fan of cakeballs, but they seem to be really popular with everyone else.  They are so popular that my chapter of Delta Kappa Gamma (a teaching organization) is planning to sell them at a fundraiser this weekend in order to bulk up our scholarship fund.  

We chose to make a classic chocolate combination of yellow cake, chocolate icing, and chocolate coating and we plan to sell them in groups of 4 for $5.  We also decided that it would be a good idea to sell individual cake pops in other flavor combos for $2 each.  Since this was for a fundraiser and the whole point was to raise money we thought it would be best to use plastic forks instead of the more expensive lollipop sticks.  

I only have only made one kind of "pop" treat before and that was when I bought a Pillsbury kit and attempted to make brownie pops.  They tasted fine, but did not look very good so I was a little nervous about trying cake pops for the fundraiser.  But, they actually turned out pretty great!!  Here's what I did...

I started the same way I do with cakeballs and baked a cake and mixed in icing.  For more directions, click here.

Then I formed the ball and inserted the plastic spoon near the base.

 
I made the cake pops bigger than  I do cakeballs since we plan to sell them for $2 each and I wanted people to get their money worth.  Even though they were bigger than normal they were still not big enough to fit the entire length of the prongs inside without having them pop out the other side.  You can see that I only put the prongs part of the way through the ball, but I still made sure there was enough prong to fully support the cakeball.  I felt much better about these than I did the brownie pops.  The fork is much more stable than a tiny candy stick!

After that I let them freeze like I normally do for cakeballs.


You can see that they took up a lot of room with all of those fork handles in the way.  I had to use two trays instead of one!

After they froze for a few hours I took them out to dip.


These were much easier than cakeballs to dip because I didn't have to worry about them following into the coating.  I did use a spoon to drizzle a small amount around the edge where the fork meets the cakeball so that there was no filling showing.

After dipping them I topped them with sprinkles and let them harden.


This happens to be a Funfetti batch mixed with vanilla icing and topped with vanilla coating.  I also made a batch of Oreo cake pops for the fundraiser.

I wrapped each on individually with cling wrap and curling ribbon.


I hope this post was helpful!  Let me know if you ever try out fork cake pops :)

Monday, September 10, 2012

DIY Shaving Lotion

Back Story: I'm not the most frugal person out there, but I definitely don't like overpaying for things when you can find a cheaper brand that does the trick just as well.  So, in an attempt to find the cheapest shampoo and conditioner without compromising quality I went a little too far and bought some VERY disappointing products.  I have had these bottles of barely used shampoo and conditioner in my guest bathroom for what I can only imagine is about two years. 

 Real Story: I've seen Pins for DIY shaving creams and lotions before, but I never really had any desire to follow through with one until I came across this one:


The picture (which is too incredibly huge to post) showed the main ingredients: Shampoo, Conditioner, Baby Oil, and Lotion. I immediately pictured those bottles in my upstairs bathroom and thought that I would finally have a reason to use them.  Don't ask me why I never just threw them out!
 
I've never really used shaving cream because I am not too fond of the rust circle that comes with keeping a can of shaving cream in a wet shower.  (And if I stored it elsewhere I would guarantee you that I would never remember to use it.)  However, I am well aware of the benefits of using something other than cheap body wash before scraping leg hair off with a metal blade!  OUCH!

So, DIY Shaving Lotion seemed like an answer to all of my problems!

Here is what you need:

1 cup conditioner
1 cup shampoo
5 TBSP baby oil
5 TBSP lotion


And here are the directions for the easiest Pin I have ever completed:

(NOTE: I went ahead and doubled the recipe since I had about 16 oz of the shampoo and conditioner left and wanted to get it all used at once!)

 Combine shampoo and conditioner.


Add lotion and baby oil.


Mix well and let sit for one hour.


In the meantime I rinsed and dried the empty shampoo and conditioner bottles.


I re-labeled them just for the heck of it.

 
 Then I used a funnel to refill them with the new concoction.


 And there you have it... the easiest Pin ever!  I don't have any 'in use' photos because shower photos would be creepy, but I will say that it works much nicer than body wash and leaves my legs feeling less beat up after a shave!

Would I recommend this Pin to a friend?  YES

Thursday, August 30, 2012

Covering an Arch Window

While it seems like this is just a narrative about a long lost donut I promise that there is a tutorial somewhere down there so keep reading!

A couple of weeks after we found out Maddox was going to be a boy we found ourselves spending hundreds of dollars at Pottery Barn Kids because we had fallen in love with their Jackson Nursery.


We got every whale item they had in the store and still had to special order a few things online!  I remember the day that the whale valence arrived in the mail very vividly.  (It's actually a little surprising just how vivid this memory is.  It was over 18 months ago, but feels like yesterday!)

  It was February and I had taken a day off of work for my glucose test.  The test went faster than I had expected, but afterwards I felt a little faint from fasting.  On my way home I stopped at Starbucks and got a decaf latte and an old fashioned donut.  (I had gone light on sugar the day before in anticipation for the test, so I was having a major sugar craving!)  I remember drinking the latte on my drive and saving the donut to eat at home (and share with Olive).  

When I got home I threw my trash away in the outside trash bin and went inside.  After a few minutes I remembered I was hungry and went looking for my donut.  I checked my purse, the passenger seat, under the seats... nothing.  Then I realized what had happened.  In my delirium from not eating I had managed to throw away my empty latte cup, my dirty napkins, AND my overpriced, uneaten donut!  I was pregnant, hungry, and in tears over what had happened.  Somehow I managed to encourage Olive (who absolutely HATES riding in the car) to go with me to a closer Starbucks and get a new donut.  Her reward was part of the donut.  She never has to know that I intended to share the original with her anyway.

I was still a little blue about the whole situation when we got back home, but I was instantly cheered up when I saw the Pottery Barn package at the front door.  I went right out and bought a curtain rod and came home to put it up.  It was the last of the whale items to be displayed in the room.


I realize that was a very long-winded explanation of hanging a valence, but sometimes you have to just retell those traumatic experiences to make yourself feel better.  If you have ever met a pregnant woman then you know that wasting a donut is very traumatic!

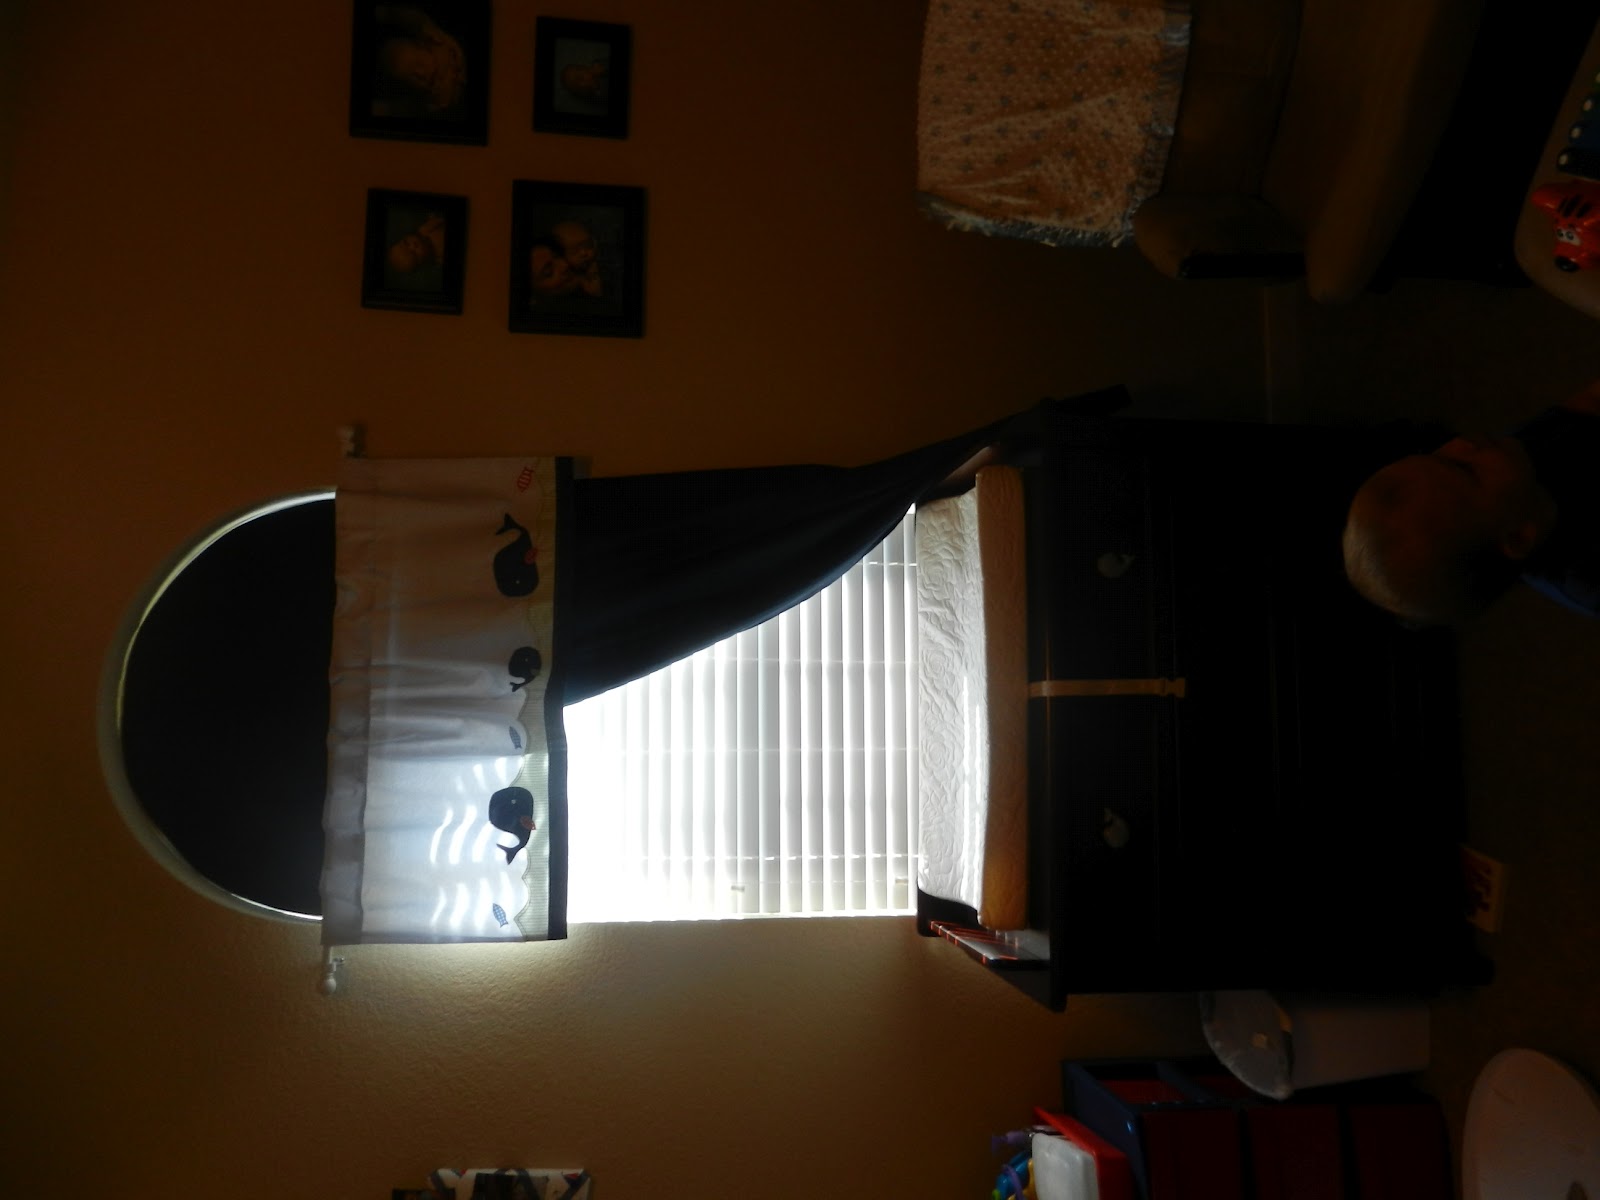
Anyways, Maddox is growing and changing everyday so his room is still a work in progress.  As his needs change his room has to adapt to meet them.  That cute little window with the arch, wooden blinds, and whale valence looked absolutely adorable.  And for the first two months of Maddox's life he stayed in our room and we continued to think it was perfect.  Then Maddox started sleeping in his room and we realized that the adorable valence did absolutely NOTHING to block light into his room.  I went to Target and bought a tension rod and a blackout curtain.


It was navy, but not the same navy.  It helped keep out light so I tried not to let that bother me!  This worked fine for the next ten months, but then summer came.  I was done with school and Maddox no longer had to wake up with the sun.  But, nobody told Maddox.  He continued to wake up early long into the summer.  After several weeks of this I decided to do something.  I searched Pinterest for how to cover an arched window and this is what I found.


I didn't want the exact look, but I knew that I could make the general idea work.

First, I gathered my materials.  I used two poster sized foam boards, packing tape, craft batting (which I realize now is unneccesary), another blackout panel to match the one hanging, and a glue gun.

It took me a lot longer than you would think to get this project going.  The problem was I really only had time to work on it when Maddox was asleep, but I kept forgetting to measure the window until after he was asleep so it was impossible to do anything!  Then, one day last week (after a particularly early awakening) I finally remembered!  

I had to act fast though because Maddox was already showing signs that he was ready for his morning nap.  


 Notice the empty milk container and droopy eyes.  He was also nearing the end of that Jesus book (which is his all-time favorite pre-nap book).  (PS- It is only a coincidence that he is wearing a whale onesie in this picture.  I promise that not everything he owns is covered in whales!)

So, I quickly measured the foam board by placing it over the window and tracing the line where light met shadow.  (I know, that is very technical.)

Then I cut as quickly as I could without drawing Maddox's attention to the giant pair of scissors.  I placed the pieces back on the window to ensure that I had made the right cuts. 


I used packing tap to tape the two pieces together as best I could and then put Maddox down for his nap.  I knew that I could finish the rest outside of the room.

The reason I said earlier that I used craft batting to pad the cover was because I really wasn't sure how I was going to hang this covering once I had it made.  I thought if it was cut to the size of the window and then padded up to be slightly bigger than the window then it just might wedge in there and stay up on it's own.  It did not.  So, do not waste your time with that step!

The next necessary thing I did was to cover the foam board with the blackout curtain.  (You can just use any fabric that you want.  I chose to use the blackout curtain because I wanted to match the hanging curtain.  I wouldn't dare introduce a third shade of navy into the mix!)  I didn't want to just cover one side of the board because I wanted it to look decent from both sides of the window. 

First, I found a natural halfway crease in the curtain and lined up the flat side of my board.  

I cut about two inches away from the board and followed the arch all the way around.  Then, I hot glued the curtain to the edge of the board.  (Remember, just ignore the batting layer.)

After I had one side hot glued on I folded the arch down and began to measure the other side about 2-3 inches out.


Then I folded over the excess and glued it to the "back" side of the arch.


The "back" side doesn't look perfect, but I don't think that anyone could see the hot glue lines from the front yard so I am not too concerned.

I finished this several days before I actually put it to use.  I really wasn't sure how I was going to hang this in the window.  Then I remembered these foam adhesive squares I had bought for another project.


I tried them, but there were so many grooves on the window that I could not get it to lie flat enough for all of the squares I used to touch the window and it didn't hold.

 When I showed it to Konrad he said it looked nice, but then quickly asked me why I had made it so long.  I told him that I thought it should go down a little below the valence to keep all of the light out.  Then he said, "Oh, I just thought there was a little ledge up there that you could set it on and just lean it onto the window."  He was correct.  I hadn't realized that the top of the blinds made a nice little ledge.

After sitting for a few days trying to think of a way to hang this cover without super gluing it to my window I just gave up.  I got out the tape measure and measured the distance from the top of the window to the top of the blinds.  Then, I measured the same distance on my board, drew a line, and started to cut.

I chopped off the bottom part which left a ragged edge.  This would not have been my first choice so just remember to check for a ledge, measure twice, and cut once if you plan to try this yourself.  Fortunately, you can't see the ragged edge when it is in place.  The even better news is that it works great at keeping out the light!  His first nap after I put up the cover was 3 hours long!


You'll notice that it does make the room a little dark for play time, but during the day we have learned to pull aside the hanging curtain and open up the blinds.  We're loving it!


Tuesday, August 21, 2012

Hard Water Clean

If I have learned anything from Pinterest it is that you can clean anything with some combination baking soda, hydrogen peroxide, Dawn dish soap (the blue one!), and vinegar. 

At least that is what the Pins claim.  I have had no luck using Dawn, hydrogen peroxide, or baking soda to get a grease stain from Konrad's favorite shorts.  But, the instructor in my workout class claims that they are better than tomato juice at getting the skunk smell off of a dog.  Hopefully I do not have to try that one out! 

With such mixed results I was skeptical when I saw this Pin...


The Pin is step by step instructions for cleaning hard water stains from the little water catching tray on your refrigerator door.  Mine wasn't quite that bad, but needed some attention so I gave it a try.

Basically all you do is soak the tray in vinegar for 3-4 minutes and then use an old toothbrush or scrubber to remove the hard water stains.


It's hard to tell from the before picture just how bad the original stains were because I took the picture after I had already rinsed the tray.  That's the tricky thing about hard water stains.  You can't really see how bad they are until the surface is completely dry. But, I promise the before and after were night and day.

So this got me to thinking.  Would the same method work on other surfaces?  There was this spot (and by spot I mean 1' X 1' surface area) of my granite kitchen island that is covered with hard water stains.  This is because it is right next to the sink and whenever I reach up to grab some soap water sloshes all over.  

Now, I will say that I do try to clean up after myself each time, but water droplets can be hard to spot on such a multi-colored granite surface.  In fact everything is hard to spot on my kitchen counters.  I could have bread crumbs for weeks and not ever see them!

I have tried all kinds of granite cleaners for this area and nothing has worked.  I truly just gave up and decided not to think about it until we try and sell the house.  That was, until I got good results from the refrigerator tray.

So, I laid some paper towels out over the area to absorb the vinegar and keep it from running off the side of the counter and then poured a thing layer of vinegar on top.  


I let this sit for a little bit longer than the refrigerator tray since it was a much bigger area.  I used the extra time to relocate my hand soap to a small container that I suction cupped to the inside of my sink.  It took some getting used to, but weeks later I barely notice the change!


Then, I got to work scrubbing away...


After I let it dry completely I was actually pretty impressed with the results.  It's not perfect, but looks 50X better than it did before!


NOTE: After taking this picture I went back and did the same thing around the faucet handle and got rid of those white marks too.  Just imagine that the original stain took up about 6 times that much space!

After moving the soap I am happy to announce that the hard water spots have not come back!


Monday, August 20, 2012

Oreo Cakeballs: A How To

I do not like cakeballs.  There, I said it.  I know that this makes me some kind of wierdo, but they are just too sweet for me.  But, to each his own.  And most people LOOOVE cakeballs.  Therefore I have made hundreds of cakeballs for other people and they are pretty popular. 

Cakeballs are my one hit wonder.  They are the one thing that I can bake consistently well.  (You will see soon just how easy they are and that will no longer impress you.)

When Konrad and I first got married my college roommate Caroline came to visit.  She told me before she came that she was bringing the supplies to make something called cakeballs and that I just had to try them.  We worked very hard together to make those little balls and since it was my first time to make them and only her second they turned out tasty, but not too pretty. 

When she left that weekend she took a few for the road, but left the majority with us.  I was worried as to what we were going to do with dozens of strawberry cakeballs, but Konrad gobbled them right up.  I tried various flavor combinations trying to find one that I liked, but I eventually determined that I just do not like cakeballs and I am okay with that.  (I will eat the funfetti ones, but I think that I would eat anything mixed with funfetti!)

Now you are probably wondering what this post has to do with Pinterest.  Well, cakeballs used to be this hidden little gem that me and my good friends knew about, but most people had not even heard about them.  It was fun getting to tell people about cakeballs and giving them their first taste.  But now with Pinterest out there EVERYONE is on the cakeball bandwagon.  (I actually saw that they sell cakeballs at Buc-ee's gas station on my way to Austin last month.)


So, now that you have seen those beautiful pictures you may not have the desire to keep reading my recipe about how to make my dumpy little cakeballs, but I promise that this is my most popular combination.  My main reason for writing this out in blog/picture form is that next time someone asks for the recipe I can just send them the link :)

Cakeballs are actually really easy.  I make them using boxed cake and canned icing.  This Oreo cakeball recipe is a little unique because I add in crushed Oreos, but in general you do not need much more than a cake, icing, and candy coating.  Don't worry if you do not like Oreos because I have included some other cakeball combinations at the bottom.  The basic steps will be the same.  (By the way, if you do not like Oreos you are stranger than me for not liking cakeballs!)

So, let's get started...

Gather the items that you will need.


Ingredients:
Devil's Food Cake Mix
Oil
Water
Eggs
Vanilla Frosting
15 Oreos
1 or 2 packages of vanilla candy coating

The first thing you are going to do is bake the cake as directed on the package.

Before

After

Now, this is the part that is most difficult to explain so I am glad I finally took some pictures to go along with my explanation.  See that cake in the above 'After' picture?  It had only been out of the oven for 30 seconds before I took this picture... 


And before I let another 30 seconds pass I did this...


That's right.  I dumped an entire tub of icing onto a burning hot cake.  Even though you are generally told to let a cake cool before you ice it this is not the case with cakeballs.  Do not ice the cake on top, but actually mix the icing in so that it melts into the cake. (I suggest you use an oven mitt on one hand to hold the pan and a spoon in the other to mix it.)

I have two main reasons for mixing the icing with the cake while it is still hot:

1) The icing melts quickly and absorbs right into the cake.

2) If you let the cake cool then the top layer will start to harden.  This will make your cakeballs lumpy.

Here is the added step for the Oreo cakeballs:
 Crush 10 Oreos with your hands and pour them into the cake/icing mixture.  Stir it in just as you did the icing.

Add 10 Oreos
Mix Well

If you are making another combination just go ahead and skip that step.

 Now that you have your cake and icing mixed it is okay to let them cool for about 15 minutes.  You do NOT want to start forming the balls when the mixture is still too hot.  Trust me!

Form the cooled mixture into little balls.  Some people use a measuring scoop to ensure that each ball is the same size.  I just eyeball it and they are generally the same size.  (The only reason that the mixture looks darker than the previous pictures is because the icing has completely melted and mixed into the cake during the cooling process.  Also, I am not that good of a photographer.)

Next you will take a cookie sheet and cover it with wax paper.  Place the cakeballs on the wax paper.  You can put them as close as possible without touching.  You should be able to fit them all on one tray.  


Note: I use a disposable cookie sheet for this because a regular sized cookie sheet will not in my freezer.  Freezing is a requirement so if your cookie sheet does not fit in your freezer then you will need to get a smaller one or find some random things from your kitchen that will hold the cakeballs and still fit in the freezer. (Cutting boards, Tupperware, etc.)


This time I made 32 1/2.  That one in the top right corner was too small to consider a full cakeball, but I didn't want to waste anything!

Now here is the deal with freezing:
  You need to freeze them for a minimum of one hour so that they can harden and cool enough to be dipped.  But, if you do not have the time to do the whole project in one day you can freeze them overnight.  
 If you are ever in a situation where you have frozen them overnight, but do not have time to dip them the next day you can keep them in the freezer long term like other foods.  Just make sure that you take them off the tray and place them in a freezer bag or freezer safe air tight container as soon as possible.  You don't want them to get freezer burn!

Once you have let them freeze take the tray out of the oven and it is time to start the dipping/decorating part!

For Oreo cakeballs you will have to take an additional 5 Oreos and remove the filling.  I just use a butter knife to do this.


What you do with the middles is up to you, but they are not needed for the topping.  Since I do not actually eat the finished cakeballs I consider this deliciousness my reward for making them!


Crush the remaining cookies as finely as you can.  This will be used to sprinkle on top of the dipped cakeballs so it is important that you get the pieces very small.

Now you need to melt the vanilla coating.  Vanilla is much more sensitive than the chocolate coating.  If you have had experience with chocolate coating, but not vanilla coating then make sure you follow these directions.

1) Pour the candy pieces into a microwave safe bowl.  (You can buy the kind that comes in a microwavable tray, but that contains less candy and you will probably end up using 2 packages.)


Microwave the bowl or tray for 30 seconds.  Remove from microwave and stir.  Put it back in the microwave for another 30 second.  Remove and stir.  Continue to do this until it is completely melted.

The first time you pull it out and see that not much has changed you are going to be tempted to zap it for more than 30 seconds.  DO NOT do that!  If the vanilla cooks for just a few seconds to long the entire container is ruined!

It should end up smooth like this...


Now you can dip the cakeballs into the coating.  I use a large metal spoon to flip the cakeballs and then scoop them out.  Gently pull them out and place them on the wax paper to cool.


The vanilla coating will harden quickly so go ahead and sprinkle them with the Oreo crumbs as soon as you get them on the wax paper.  Do not wait until you have dipped all of the cakeballs.  The crumbs will not stick if the coating is too hard.


Leave them on the wax paper until they are all completely hard.


 At this point you can place them on a serving tray or in a storage container.

They can stay in an airtight container at room temperature for about 4-6 days or frozen in an airtight freezer container for up to a month.

I hope you enjoy!!

Other Cakeball Combinations I have tried:

Strawberry Cake- Cream Cheese Icing- Vanilla Coating
Red Velvet Cake- Cream Cheese Icing- Vanilla Coating
Yellow Cake- Chocolate Icing- Chocolate Coating
Funfetti Cake- Funfetti Icing- Vanilla Coating (top with the sprinkles that come with icing)